General information
Theme Name: Borax - Powerfull WordPress ThemeVersion: 1.0
Created: 27/10/2021
Created by: Themies
Any Advice?: Send message from contact form
Need Help ?: Open support ticket in our Support Center
Thank you for purchasing our theme. If you have any questions or need any help please open a ticket in our support forum . Thanks so much!
Introduction.
Thank so very much for purchasing Borax - Multi-Purpose WordPress Theme. If you face any problem to use the theme or need any technical support feel free to contact with us.
What’s included
- Theme – The theme files are located in the /code folder
- Documentation – Theme general info and a link to this documentation
- Licensing – General license information
- Plugins – The theme required and recommended plugins, namely Unyson, Revolution Slider, Borax cpt.
Install Theme
The first option how to install this Theme would be to directly upload the Borax.zip file via WordPress Theme Uploader.-
FTP Upload:
- Unzip the "Borax.zip" file from theme folder
- Open up your FTP manager and connect to your hosting
- Browse to wp-content/themes
- Upload the Borax in theme folder
- Log Into WordPress and go to Appearance > Themes
- Find the Borax Theme and click activate
-
Wordpress Upload:
- Log into your WordPress backend
- Navigate to Appearance > Themes
- Click Install Themes
- Click Upload
- Now you just need to find the "Borax.zip" in the Upload folder and hit Install now.
- After complete installation click on active button to active The theme.
Plugin Installation
If Your Theme installation was successful, you'll see a notice about required plugins for Borax
This theme requires the following plugin:
- Elementor
- Contact Form 7
- MailChimp for WordPress
- Kirki
- One click demo
- Leosspa Plugin
to proceed click "Begin installing plugin" for all Plugins install.
Follow the screenshot if you have don't Previous expirince how to install and plugins.

Just click the Begain installing Plugin and it will move to install page. select all and Install the plugin. after install click Return to Required Plugins Installer
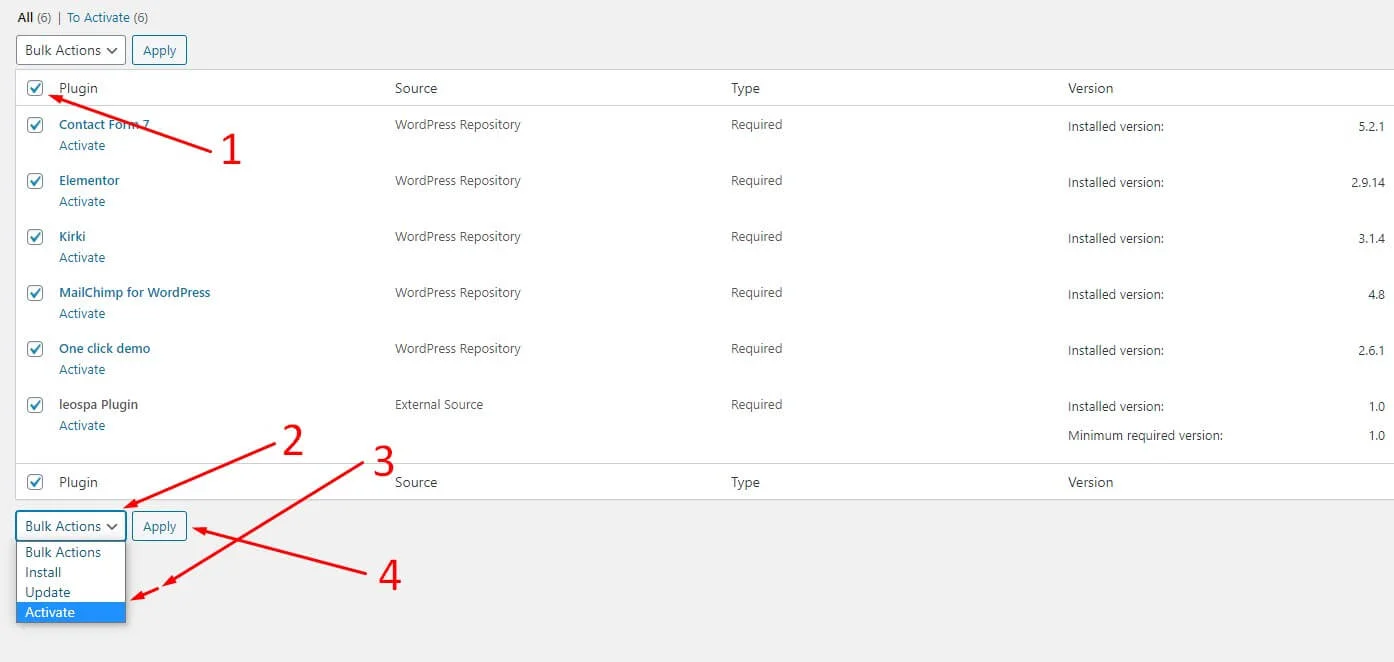
after install then active all the plugin.
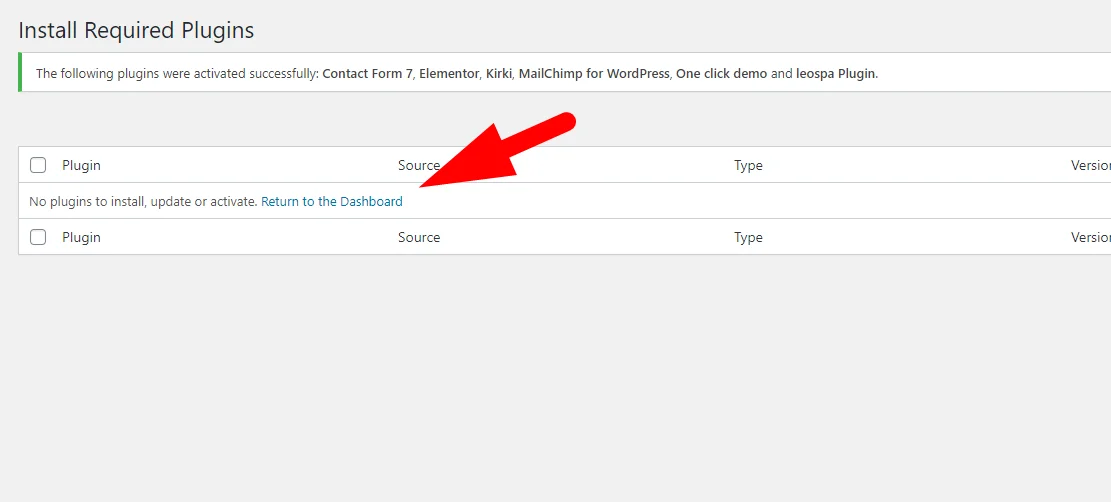
After Active click return to dashboard
Next page will see demo import options
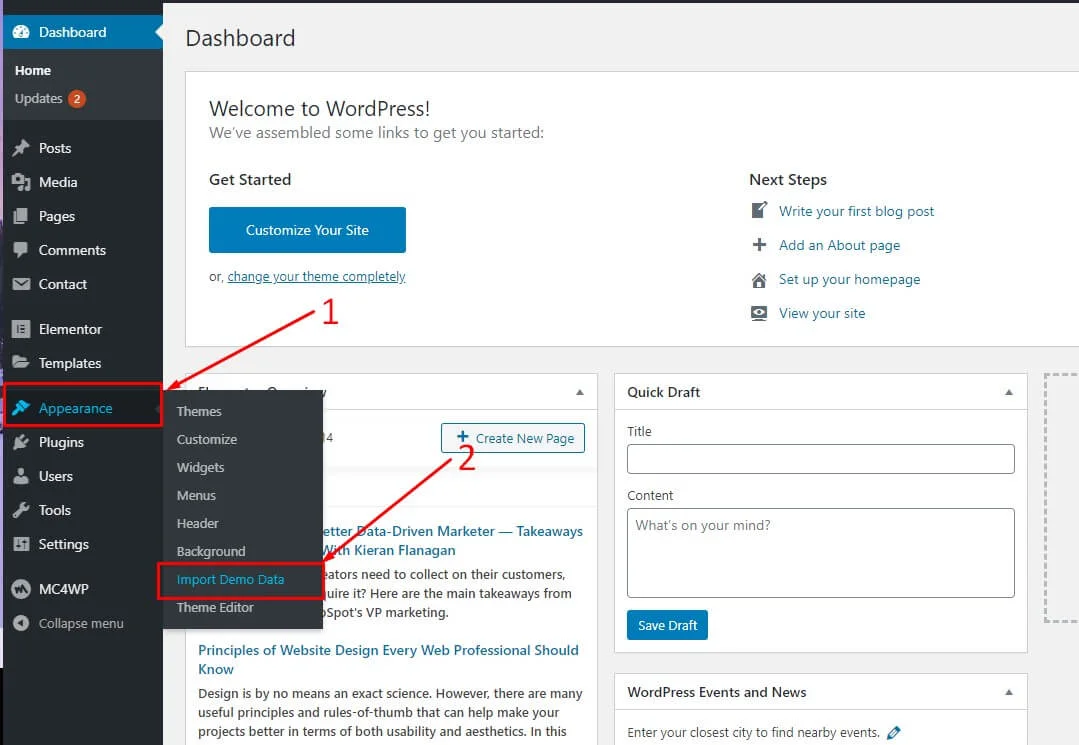
click the import demo data and go to demo import page.
Theme Setup
Borax is an Simple and Nice one page Wordpress theme. After setup the theme we need to configure some option in our Backend. We will do it step by step
You can demo install Borax theme one normal process one click demo installation with demo data
Install with Sample Data (one click Install)
You can install sample data with one click installation.
1. Borax provide oneclick sample data installation facility. To install sample data via theme option navigate Appearance -> Import demo data -> . Click on Import button as you want like spa or gym then open a popup cancel/yes confirmation. you can just click Yes,Import button and wait. it will take several min.


Theme Customizer
Borax options
You can find the all Borax Option from
General Settings

Header Settings

Page Settings
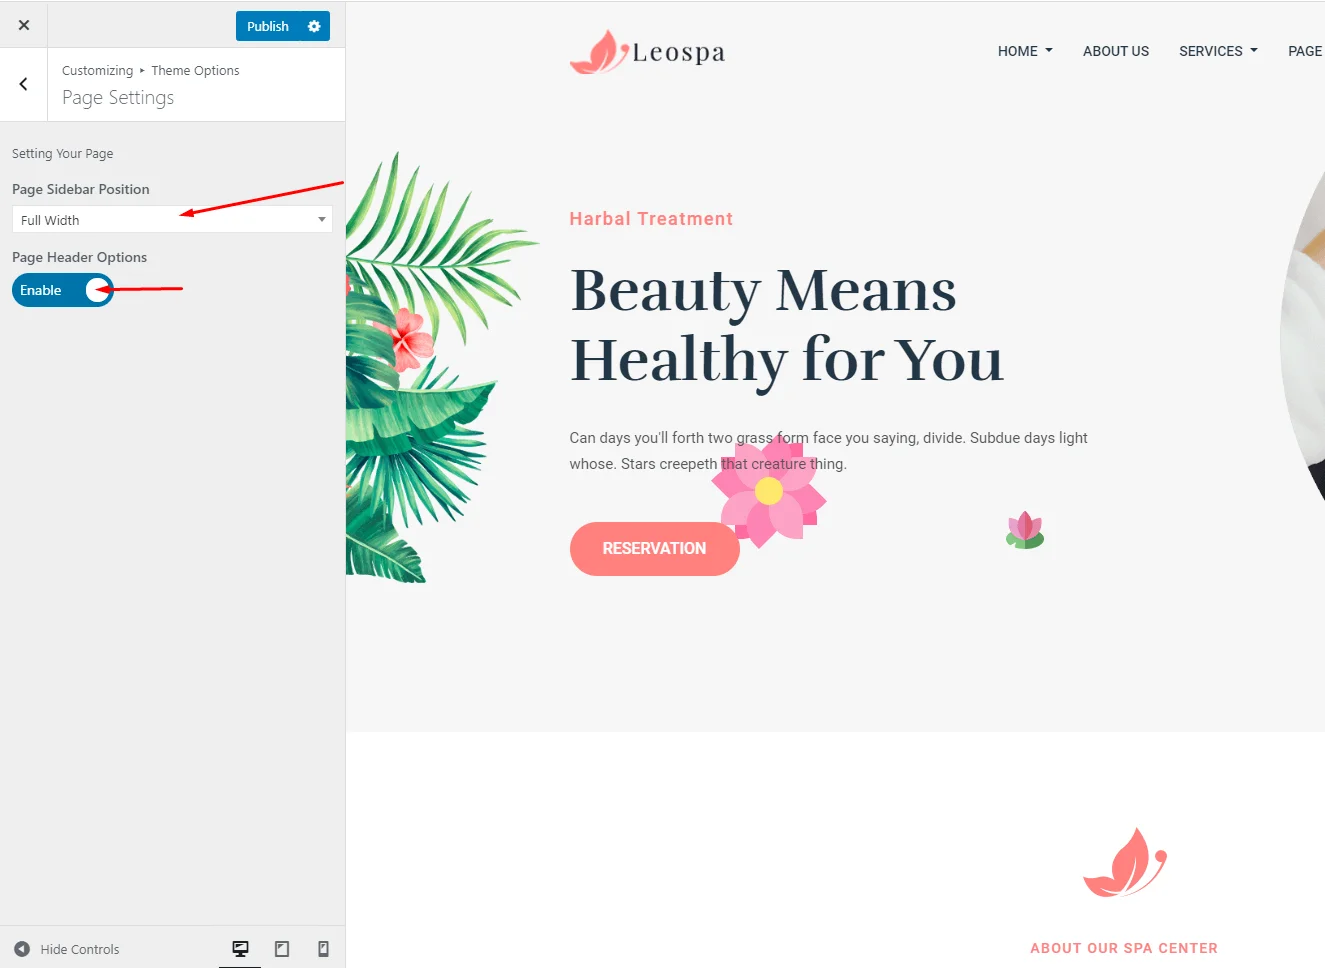
Page Header
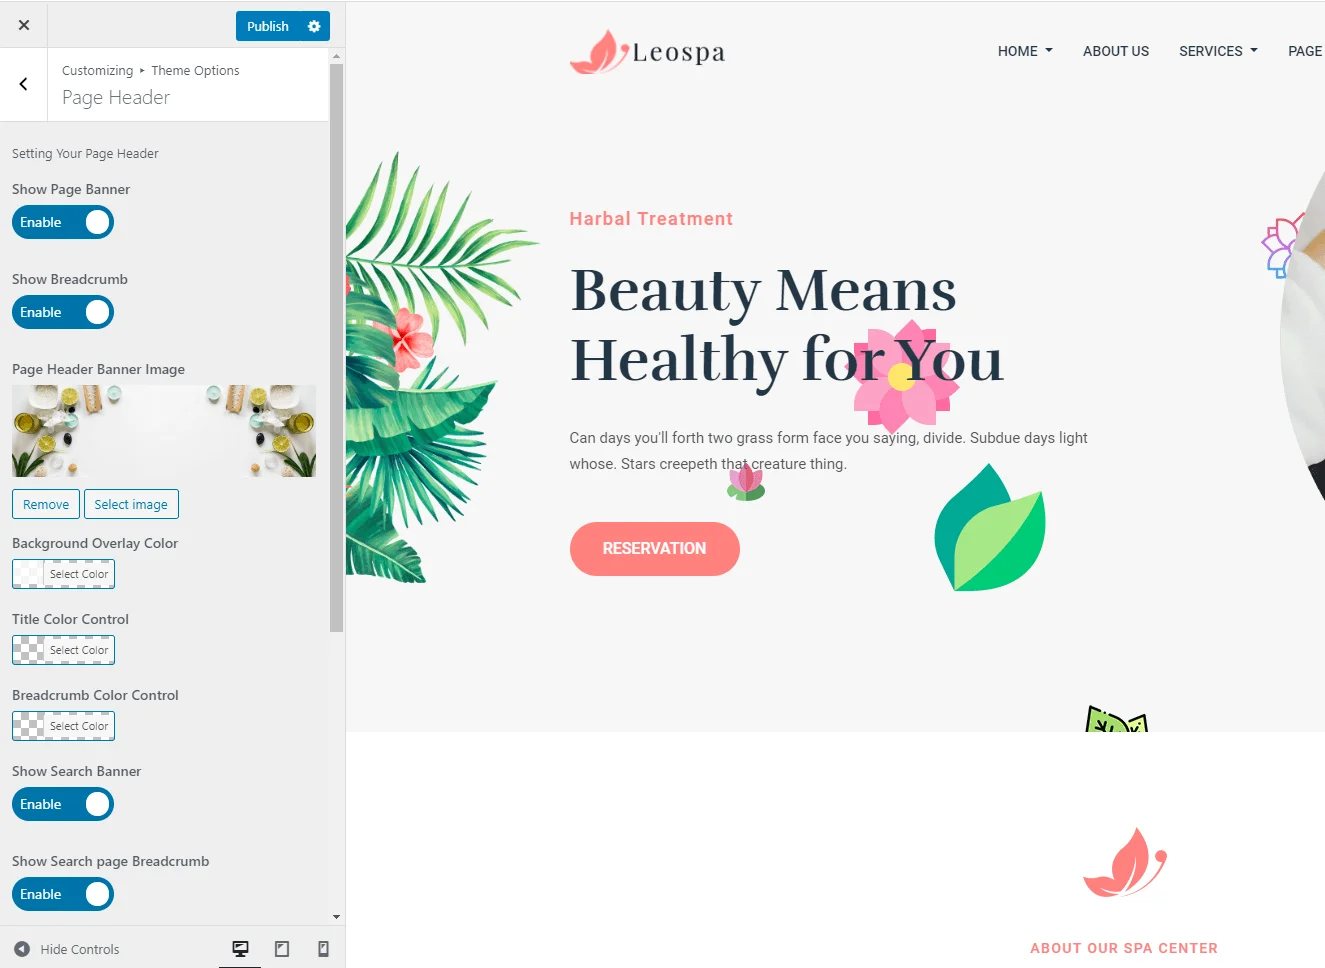
Blog Settings
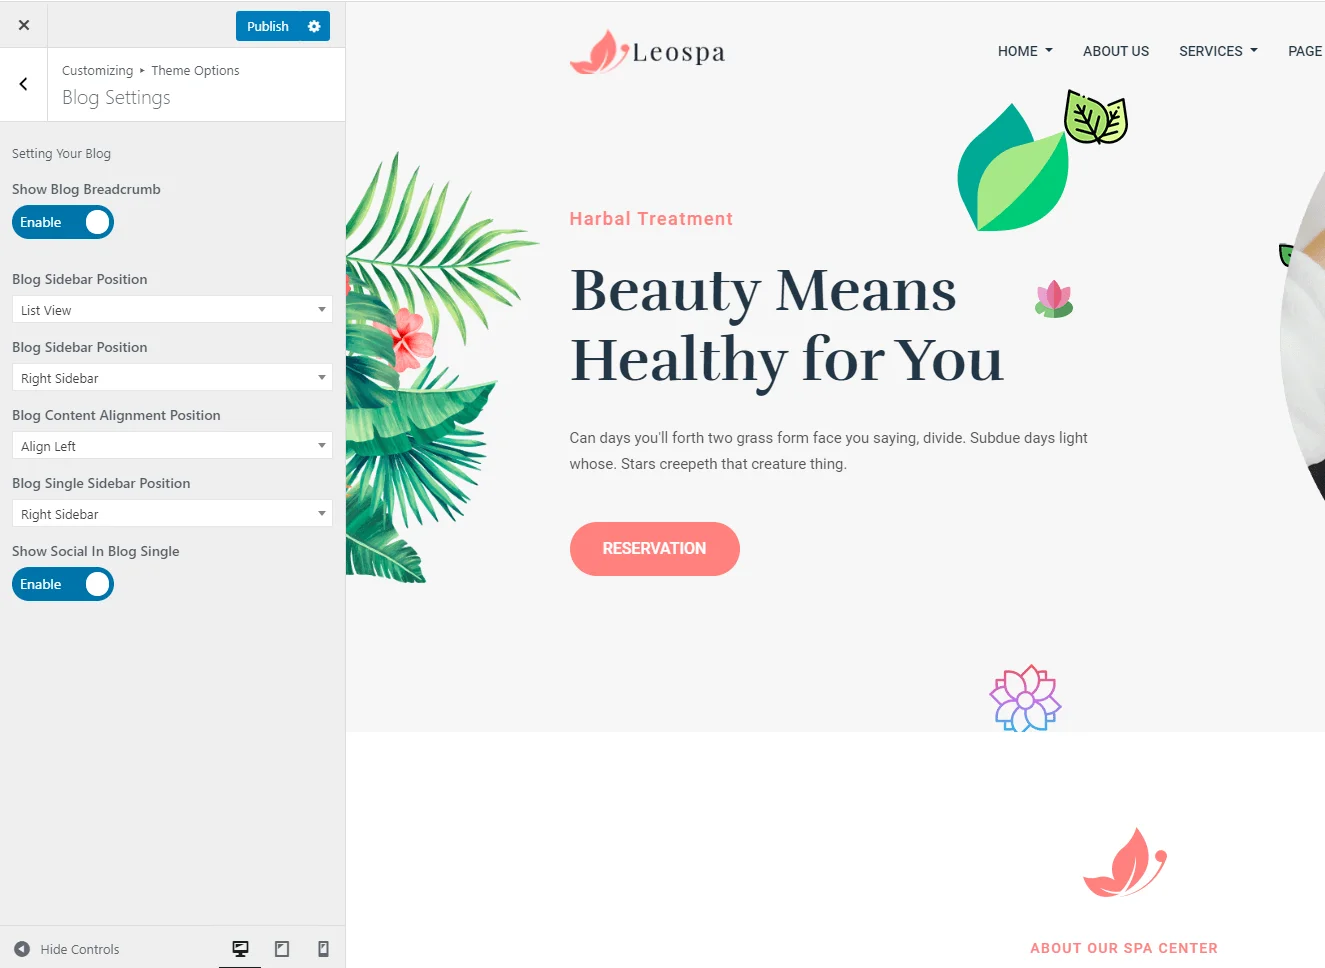
Footer Settings
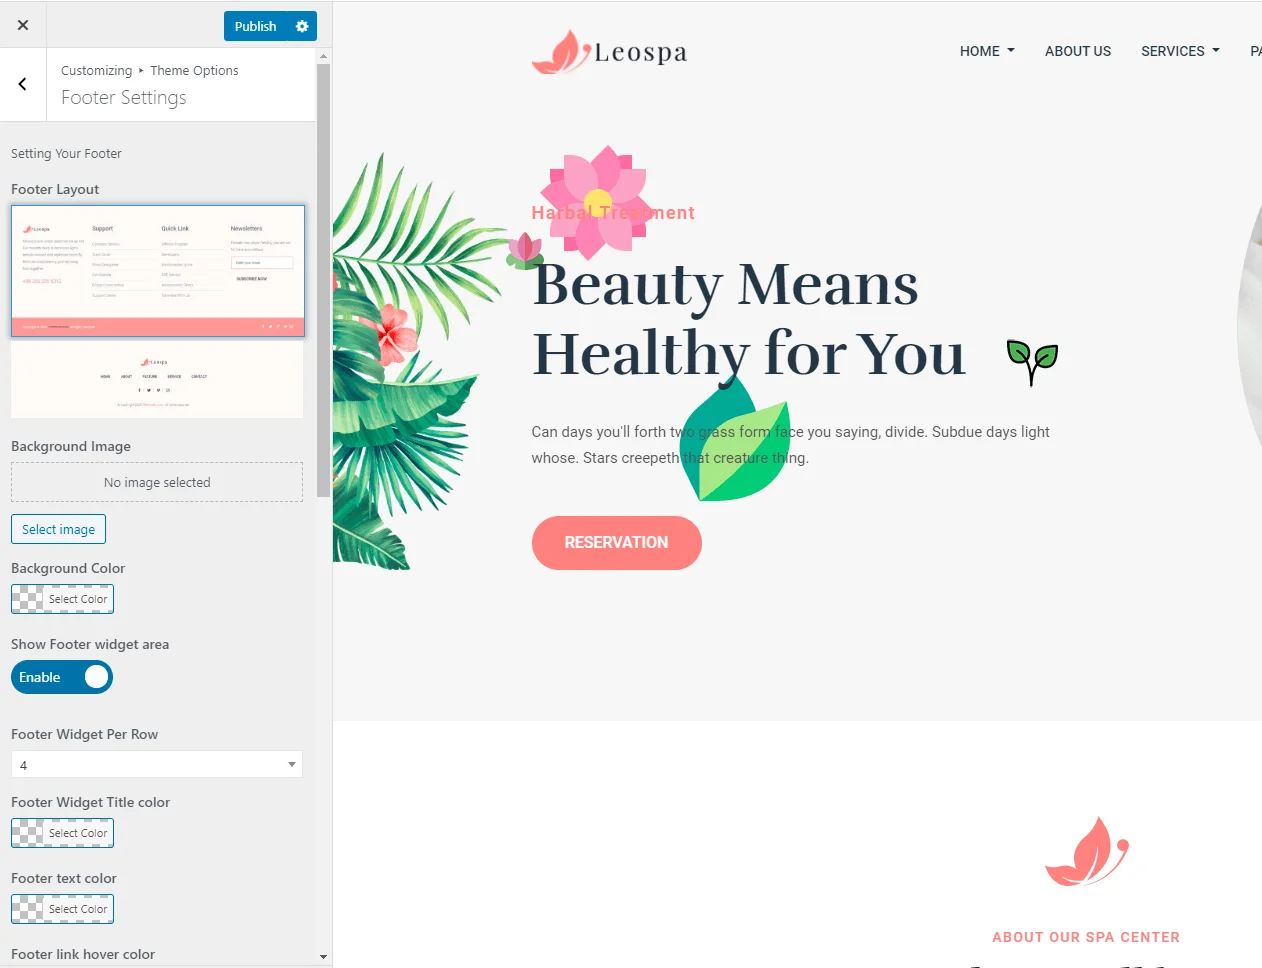
Error Page Settings
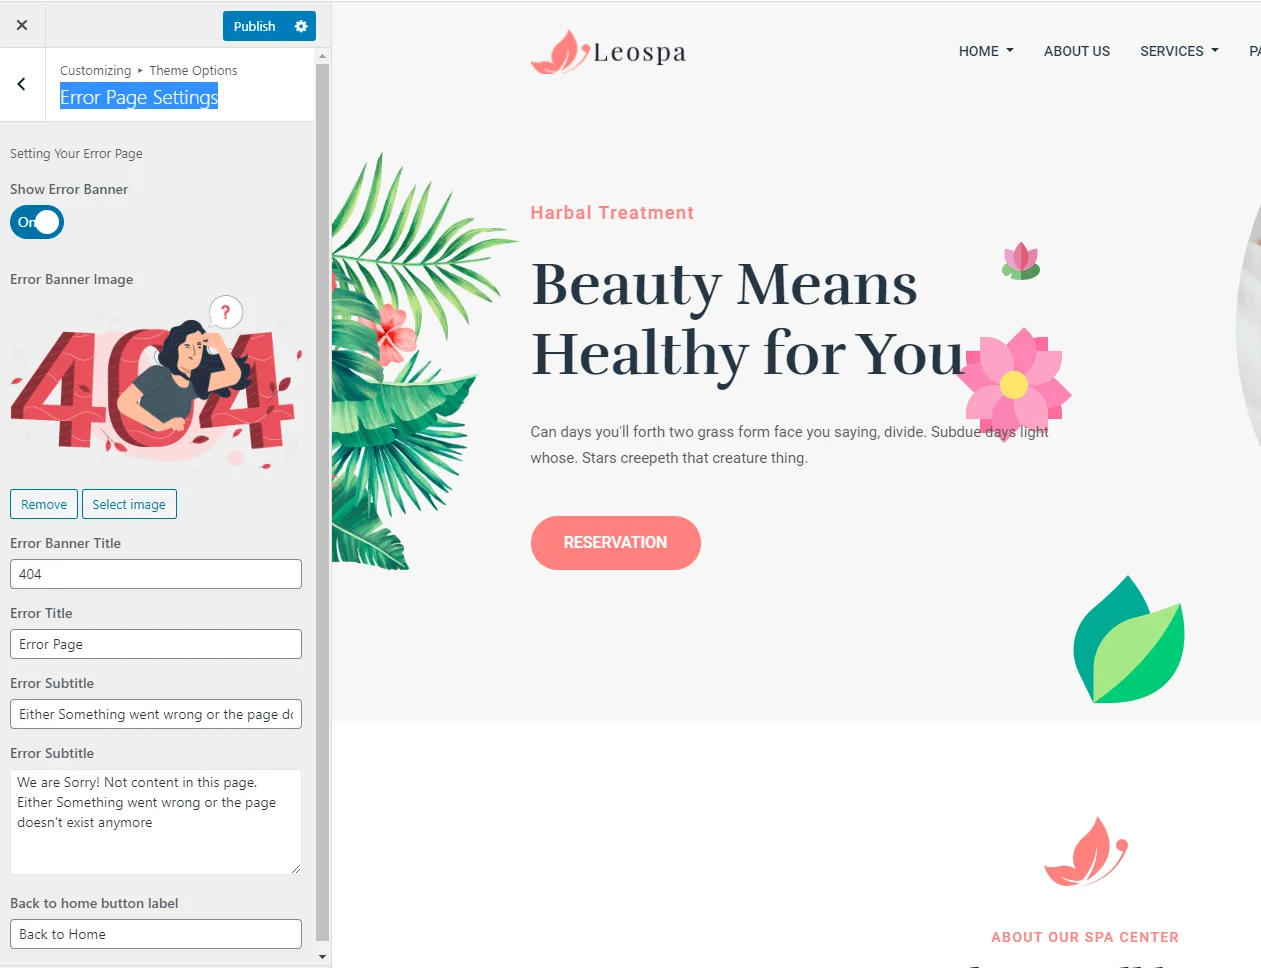
Styling Settings
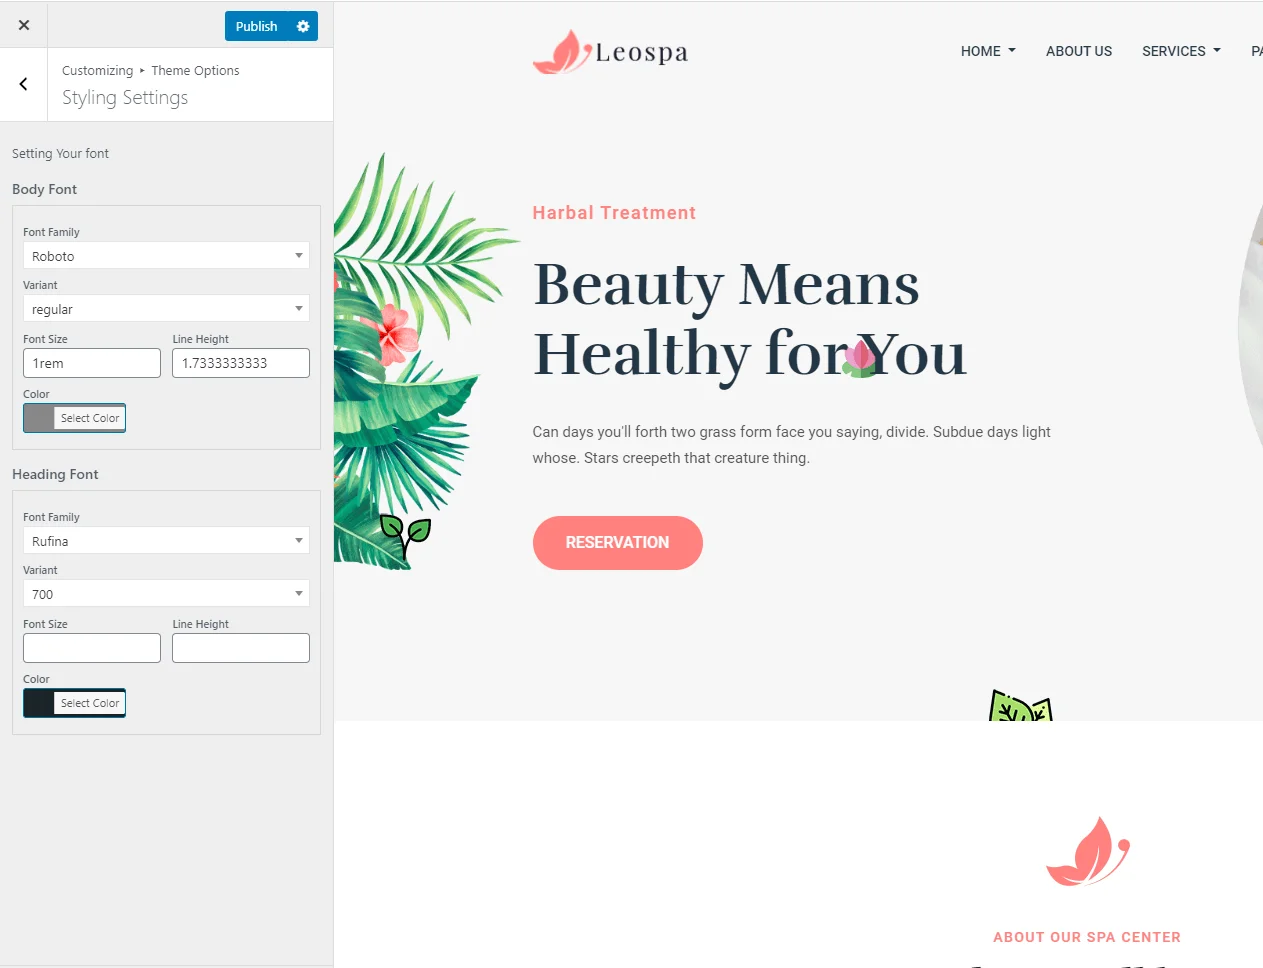
Elementor Visual Page Builder
Visual Page Builder
Accessing the editor
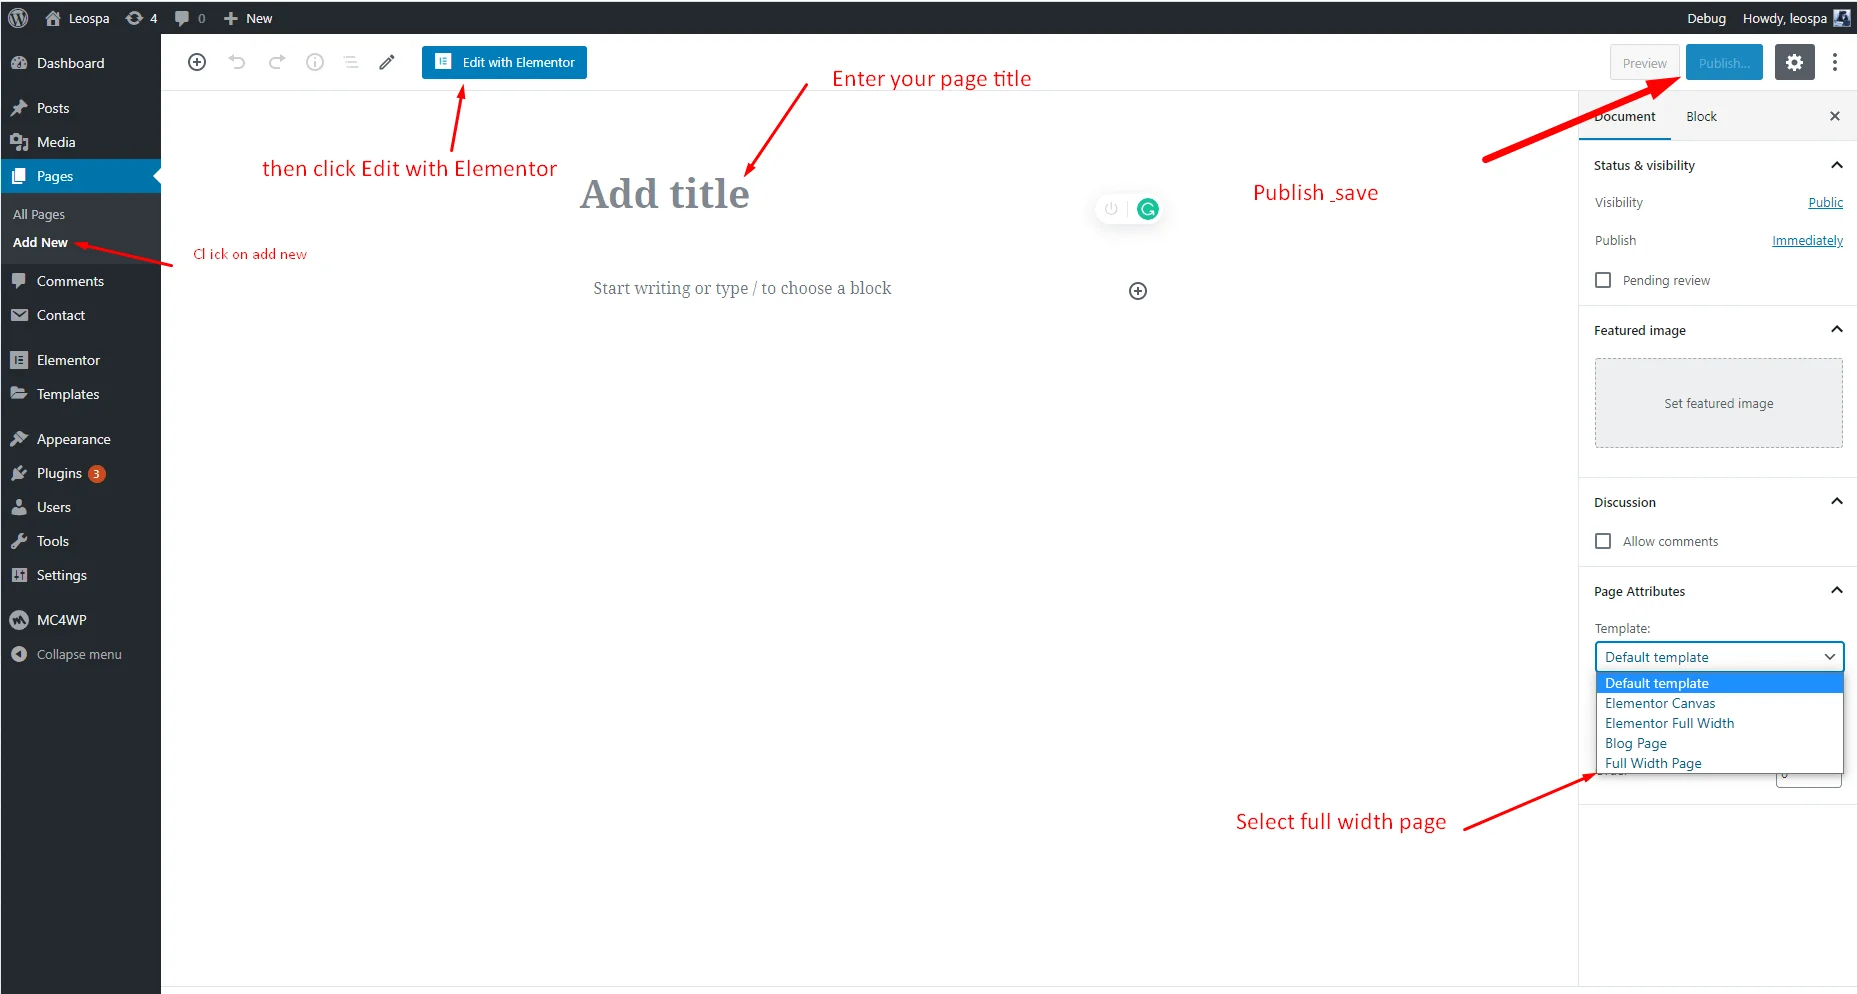
To start working with Elementor, go to the WordPress dashboard. Then, add a new page by clicking on Pages > Add New. Then, create a new page and save it with the 'full width' template and then click on the 'Edit with Elementor' button.
Elementor UI: Getting to know the interface
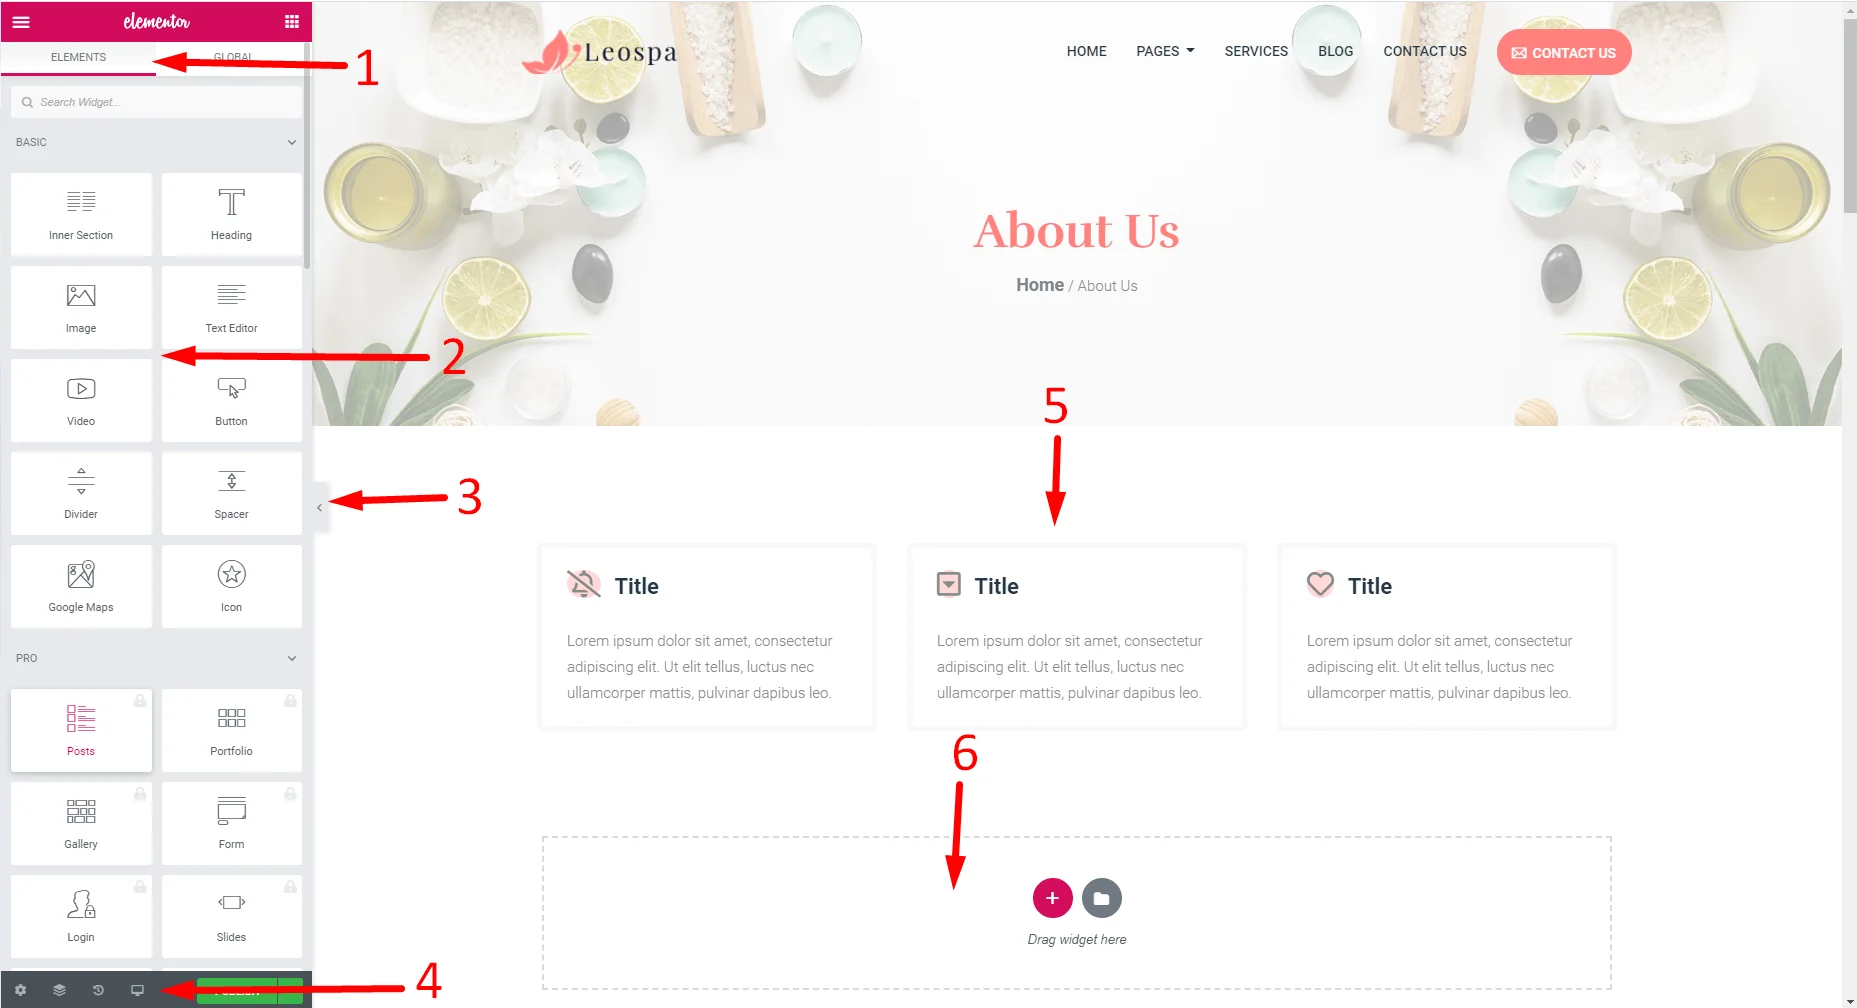
The Elementor page builder includes these main areas:
1.
Panel (Top): Use the search field to find a widget.
2.
Widgets / Widget Settings: Choose a widget and configure it.
3.
Preview Button: Enables you to preview the page. Once clicked it
hides/shows the panel.
4.
Panel (Bottom): View page, Go back to Dashboard or Save page.
5.
Content Area: Drag & drop widgets and design your page.
6.
Add New Section / Add Template: Choose between creating a new section
or inserting an existing template.
Creating your section
Contact and Booking
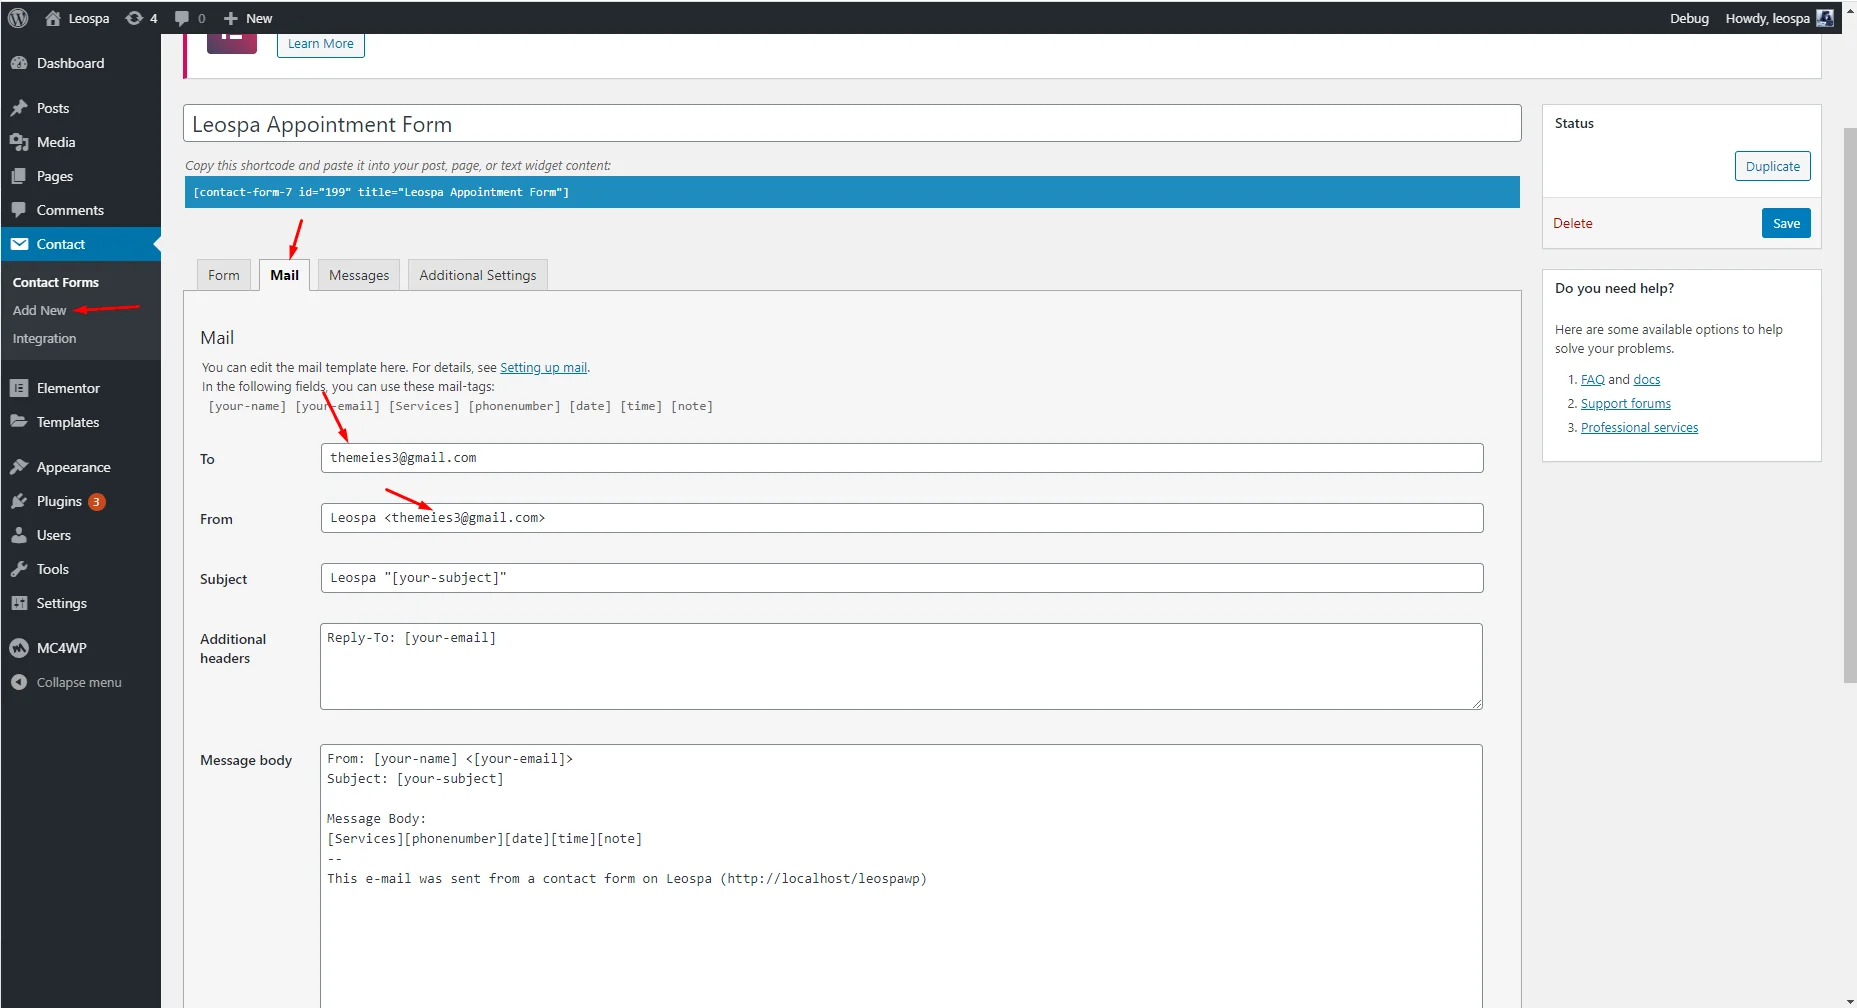
Go to Contact > Contact Forms.
Click on Contact > Contact Forms > Contact form 1 then click mail tab and change mail address

Click on Contact > Contact Forms > Booking then click mail tab and change mail address
Credits
The Plugins/Components that were used to make this theme:
- Bootstrap - http://getbootstrap.com/
- jQuery - http://jquery.com/
- Modernizr - http://modernizr.com/
- fontawesome - http://fontawesome.io/
- animate.css - https://daneden.github.io/animate.css/
- fonts - https://www.google.com/fonts
- allfreephotos - http://allfreephotos.net/
- flaticon - http://flaticon.com/
- icomoon - https://icomoon.io/app/
- twentytwenty - https://zurb.com/playground/twentytwenty
- fancybox - http://fancybox.net/
- owl carousel - https://owlcarousel2.github.io/OwlCarousel2/
- countdown - http://hilios.github.io/jQuery.countdown/
- isotope - https://isotope.metafizzy.co/
- instagramFeed - https://github.com/jsanahuja/jquery.instagramFeed
icons Used:
Images Used:
Once again, thank you so much for purchasing our theme. As we said at the beginning, we are glad to help you if you have any questions relating to this theme.Support should be provided only via the TemplateMonster author profile.
Themies

